For HGTV's Look What I Did!, which films in December and airs sometime that month.
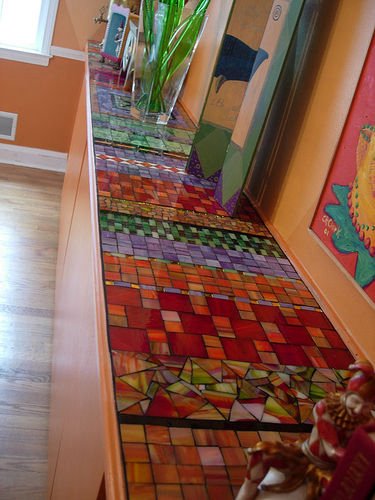
The top of this buffet, which measures 12.5 feet by 14 inches (14.5 square feet), was made in my tiny workshop, then installed in Beth's home. The materials—including stained glass, glue, mesh, and grout—were about $350. Labor is between $75 and $100/square foot.
The first thing I do, once all the glass colors have been chosen and brought to the house to make sure they work, is cut some pieces of various sizes and shapes. Some are nibbled with wheeled cutters; others are scored with a Toyo glass cutter against a straight edge.
After cutting various squares and rectangles in different sizes in my workshop, I take the glass to the site to see how it looks—and see if my designs are compatible with the room and attractive.
When I'm happy with an arrangement and get a feel for how the pieces will fit, I take a picture (who could remember such a layout?). Then I remove the glass and make a template. I lay large sheets of tracing paper on top of the buffet and trim them, front and back, to fit exactly. I keep all the panels of paper side by side until I finish cutting, and then I number them.
Next, I take the template home and tape the first piece in place on my shop table. (I begin working from the far right.) Over the template, I tape plastic wrap, and on top of that, I tape fiberglass mesh (see sidebar for materials and links). The plastic wrap keeps the glue from sticking to the template and the tabletop and peels off nicely just before installation.
I lay some glass out in a pattern to see how much space I need between tiles, and then I move it all aside for gluing. I use Tacky Glue, just enough to stick the tile to the mesh. It will be glued to the buffet with silicone later.
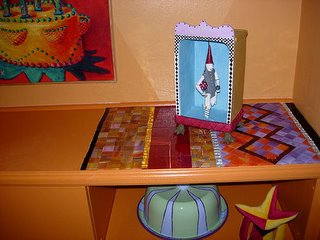
There's always the chance that all my hard work has gone to waste, so before doing any more panels, I make sure the first one fits! It can't overhang the front, and it has to look straight. We are going to apply some quarter-round molding at the edge afterward, to clean up the edge.
It's perfect. I can continue working at home! Yea! (This is why we are self-employed, after all.)
All the panels are finished, and it's time for installation. The plastic wrap will be pulled away from the mesh, and the glass glued to the mesh will be glued to the top of the buffet today.
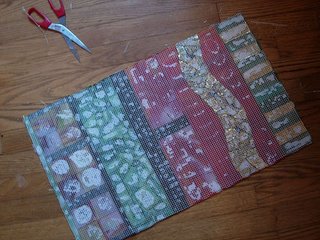
Here's the back of the glass-covered mesh after I've trimmed it and removed the plastic wrap. As you see, the glass is glued to the mesh. It won't fall off when I pick it up.
The mesh is a wonderful invention. The best part is it allows you to work indirectly without having to reverse the pattern.
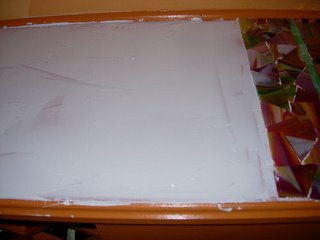
I apply silicone glue from a tube (not caulk), the kind that is paintable and cleans up with soap and water. I use a stiff plastic wallpaper smoother to spread the glue. It needs to be thick enough to go beyond the mesh and onto the glass but thin enough not to come through the interstices (spaces between the tiles).
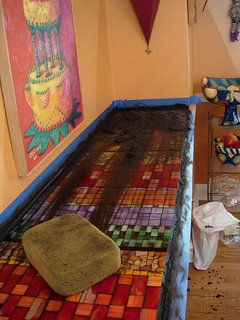
This is the scary part, but it's all worth it in the end! I mix the grout to a thick, frosting-like consistency (you know how I love cake--and working under the painting was my inspiration!), let it slake, and tape off the wall so I don't turn it black. I
should have used a plastic tarp on the floor, but the grout sweeps right up, and any wet black smears wipe right up with a sponge.
I apply the grout with my gloved hands. It's the best way. Forget the squeegie. Then I wipe off the excess with a paper towel before beginning the cleaning.
I can only wipe once on each side of a completely wrung-out sponge, and then it's back into the kitchen to rinse and wring it out again. Otherwise, you smear around wet grout endlessly.
After about two hundred spongings (an hour and a half worth of grouting and cleanup), the top will be clean.
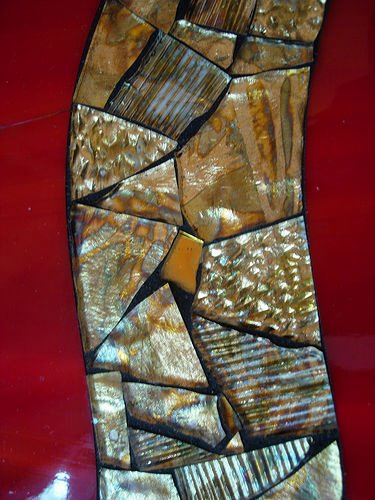
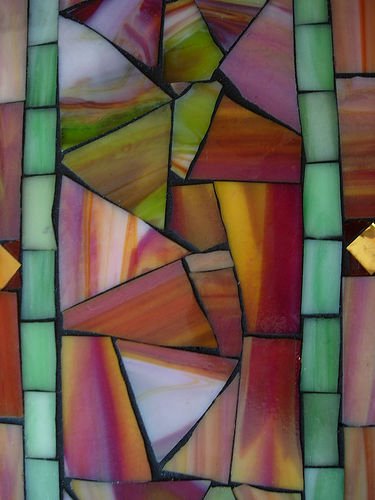
Below are detail shots of the grouted top.

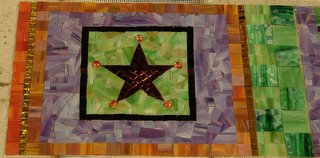
For this section, I used clear patterned glass, onto which I brushed size (glue) for gold, silver, and variegated leaf. When the size was tacky, I carefully lay the leaf on top, smoothed it out, and then sealed it with a special leaf sealant. (Mona Lisa brand kits are available in every craft shop on the planet.)

Here's a tip they don't tell you in books: if your edges are sharp after you've cut them (and
of course they're sharp; it's glass!), you need to do something about that. Put the cut pieces into a plastic bucket. Put the lid on, and shake about twenty times. That will take the burrs off the edges of the glass. Of course, you could also invest in a professional grinder, and smooth each piece of glass. It's time consuming, but it does so much more than shaking the pieces in a plastic bucket.

 Two years ago, I picked up a giant, 3-D S made of some sort of hollow paper maché or cardboard. It was only a couple of bucks. I figured my daughter would paint it, and we could hang it in her room. But I had a better idea.
  1.) Before you begin, find a comfortable place to work where you can leave your project until it's complete. Prepare the surface by covering it with a heavy piece of plastic; it will make the surface easier to clean.